| Weights | |
| Classification | |
| Balance Symptoms | |
| Correct Polar | |
| Analysis formula | For instance "Small Remedies" |
| Remedy filter | For instance "Plants" |
You now know how to create an analysis. You also know how to fine-tune the analysis, based upon your interpretation of the symptoms in this particular case.
You may have assigned weights to symptoms or rubrics. You may have assigned classifications to them. You have selected an analysis formula to weigh the importance of the remedies for the rubrics used. And maybe you have filtered the results on a given remedy kingdom.
All these settings have helped you obtain the best analysis result, based upon your interpretation of the case.
But it is your interpretation, your view on the patient's symptoms. These symptoms are invariable, they are the observed facts that you have collected. No matter what opinion you might have, the observed symptoms are the reality you have to work with. (Organon §18)
However, you might consider looking at these same symptoms from a different perspective, with a different view, interpret them in a different way. You can of course change all the settings of the analysis and see what happens. But then your original analysis has changed, and to see it again you must change back all the settings you modified.
To enable you to modify the settings of your analysis, without losing the original settings, we have created Multiple Views.
An Analysis View is the total of all the settings you can apply to an analysis.
Weights 


Classification 


Balance Symptoms Correct Polar Analysis formula For instance "Small Remedies" Remedy filter For instance "Plants"
You can create multiple views, each having their own collection of settings.
As an example, look at Demo case Andrew, analysis Multiple views.
You can create a new view via the menu or the toolbar. (Menu option Analysis / View / Add a new view, toolbar button ![]() , popup menu option View / Add a new view).
, popup menu option View / Add a new view).
The new view is a copy of the original view, having exactly the same settings. Any changes you make to the settings in the new view are exclusive to that view. All the other views remain exactly like they were.
If you want, you can optionally give the new view a name.
Note that all views use exactly the same collection of symptoms and rubrics. The patient's situation is the same, it is your interpretation that is different for each view.
You can easily switch from one view to another via the menu. (Menu option Analysis / View / Standard, toolbar button ![]() , popup menu option View / Standard).
, popup menu option View / Standard).
You can also select a view in the toolbar.
If you no longer want to use the view you have selected, you can delete it. (Menu option Analysis / View / Remove current view, popup menu option View / Remove current view).
You can always change the name you have given to the view. (Menu option Analysis / View / Rename current view, popup menu option View / Rename current view).
You can also change the order in which the views appear in the menu or the toolbar. (Menu option Analysis / View / Move current view to the left, popup menu option View / Move current view to the left).
The analysis results area, at the right side of the screen, shows you the analysis results for the selected view. When you switch to another view, the results will change to those for that view.
You can also look at all the view results at the same time. (Menu option Analysis / Multi View, toolbar button ![]() ).
).
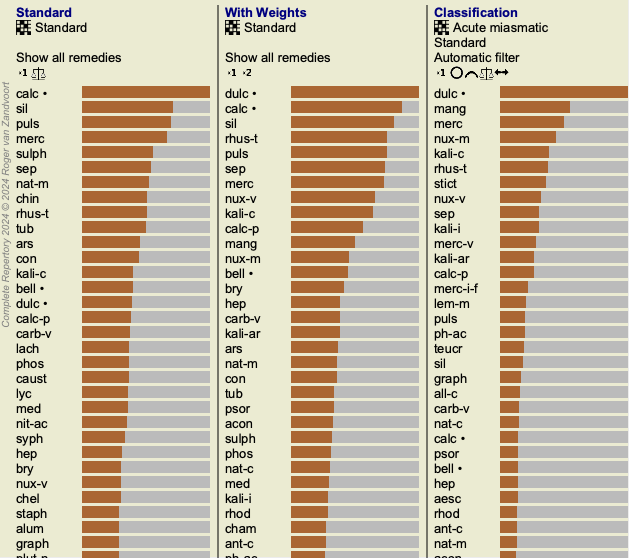
It will look like this:
It is similar to the list overview for an analysis, but shows one result list per view.
At the top you see a summary of the settings used for each view.